
Picture this: you’ve just recorded what you thought was the perfect podcast episode or video tutorial, only to play it back and hear your voice bouncing around like you’re in a bathroom. Frustrating, right? Echo and reverb problems plague content creators everywhere, from bedroom podcasters to small business owners recording marketing videos. The good news? Getting rid of these audio gremlins doesn’t require a degree in sound engineering anymore.
What’s Actually Happening With Your Audio
Before we dive into solutions, let’s clear up some confusion. Echo and reverb aren’t quite the same thing, though people use the terms interchangeably.
Echo is that distinct repetition of sound like when you shout in a canyon and hear your voice come back at you. It’s obvious and distracting. Reverb, on the other hand, is subtler. It’s the way sound lingers in a space, creating that “I’m recording in a large empty room” vibe. Think of reverb as the tail end of sound that just won’t quit.
Both usually happen because of your recording environment. Hard surfaces—walls, floors, ceilings—love bouncing sound around. Your microphone picks up not just your direct voice, but all those reflections too. Maybe you’re recording in a kitchen with tile floors, or perhaps your home office has zero soft furnishings to absorb sound. Whatever the case, the result is the same: muddy, unprofessional audio that makes listeners reach for the skip button.
Why This Matters More Than You Think
Here’s the thing about audio quality—people notice when it’s bad, even if they can’t put their finger on why. A video with crystal-clear visuals but echoing audio? Viewers bounce. A podcast that sounds like it was recorded in a tunnel? Unsubscribe.
Clean audio signals professionalism. It tells your audience you care about their experience. Whether you’re building a YouTube channel, running a podcast, or creating training videos for your company, removing echo and reverb from your content isn’t optional—it’s essential. Good audio keeps people engaged. Bad audio sends them elsewhere.
The Modern Way to Remove Echo from Audio and Video
Years ago, fixing echo meant wrestling with complicated audio software, drawing automation curves, and hoping you didn’t accidentally make things worse. Not anymore.
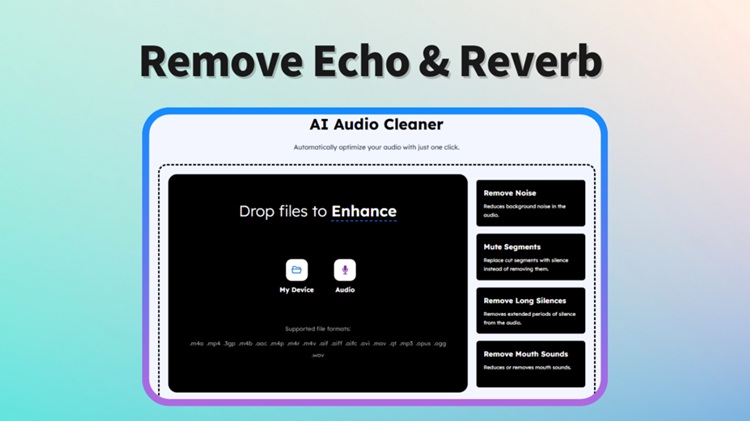
AI-powered tools have changed the game completely. Take AudioCleaner’s Echo Remover and Reverb Remover, for instance. These tools do the heavy lifting for you. Upload your file—whether it’s a standalone audio track or a full video—and the AI analyzes the sound, identifies the echo or reverb, and removes it. The best part? It works on both audio files and video files, so you don’t need separate workflows for your podcast episodes and YouTube videos.
The echo remover tackles those obvious repeating sounds that make your recordings feel amateurish. Got a video shot in an echoey conference room? This tool will clean it up without you needing to understand the first thing about frequency ranges or spectral editing.
The reverb remover handles the more subtle problem of room tone and lingering sound. It’s particularly useful when you want your audio to sound more direct and intimate, like you’re speaking right into someone’s ear rather than across a large space. Upload your video file, let it process, and download a version that sounds professionally recorded.
What makes these approaches work so well is their simplicity. You don’t need to be an audio engineer. You don’t need expensive software subscriptions. You just need a file that needs fixing and a few minutes to spare. The tools handle everything from analyzing the audio to applying the right corrections to exporting a clean file you can use immediately.
Quick Wins for Better Audio
Of course, the best way to remove echo from audio is to prevent it in the first place. Here are some tricks that actually work:
Record closer to your microphone. Seriously, get cozy with it. The closer you are, the more direct sound your mic captures relative to room reflections. Throw some blankets or pillows around your recording space and they’re surprisingly effective at absorbing sound. If you’re recording video and worried about how this looks, just set up soft materials outside the frame.
When you’re using tools to remove reverb from audio or video after the fact, give them the best source material possible. Record in the quietest room available. Turn off fans and air conditioning if you can. These small steps make the AI’s job easier and your final results better.
Common Mistakes People Make And How to Avoid Them
Here’s where things get interesting. Even with powerful tools at your disposal, there are ways to shoot yourself in the foot.
The biggest mistake? Over-processing. Some people discover they can remove echo from audio and video, then go overboard. They crank every setting to maximum, thinking more is better. The result sounds artificial and lifeless—you’ve removed the echo but also removed the natural quality of the voice. The sweet spot is cleaning up problems while keeping things sounding human. Most modern tools handle this balance automatically, but it’s worth listening critically to your results.
Another common error is trying to fix terrible source audio. If your original recording is buried under layers of background noise, music, and multiple people talking, no echo remover will work miracles. These tools excel at removing echo and reverb, but they’re not magic wands that can reconstruct completely garbled audio. Start with the cleanest recording possible, even if it still has echo problems.
People also forget about consistency across projects. Let’s say you’re producing a video series. You remove reverb from audio in episode one and it sounds great—crisp and clear. Then in episode two, you either skip the processing or use different settings, and suddenly there’s a jarring difference in audio quality between episodes. Your audience notices. Keep your processing consistent throughout a series or podcast season.
There’s also the trap of ignoring video files altogether. Some creators extract the audio, process it separately, then try to sync it back to the video. Why make extra work for yourself? Tools that handle both audio and video files directly save you steps and potential sync issues. Upload your video, let it process, download the cleaned version—done.
One mistake I see often: people record in problematic spaces when better options exist nearby. Sure, you can remove echo from audio after recording in your bathroom (please don’t), but wouldn’t it be easier to just record in your bedroom closet surrounded by clothes? Those soft fabrics absorb sound naturally. Use technology to fix problems you can’t avoid, not as a substitute for basic recording sense.
Finally, there’s the “set it and forget it” mentality. Just because you found settings that worked once doesn’t mean they’re perfect for every situation. Different rooms, different microphones, different speaking volumes—all these variables affect your audio. When you remove reverb from audio or video files, take a moment to listen to the results. If something sounds off, try adjusting your approach. Most tools are flexible enough to handle different scenarios, but you need to pay attention.
The bottom line? These tools are incredibly powerful, but they work best when combined with thoughtful recording practices and critical listening. Remove echo and reverb, yes—but do it smartly.
Conclusion
Look, nobody starts out with a professional recording studio. Most successful podcasters and video creators began exactly where you are: dealing with less-than-ideal recording conditions and figuring things out as they went.
The difference between content that finds an audience and content that doesn’t often comes down to production quality. And audio quality sits at the top of that list. Don’t let echo and reverb be the reason someone clicks away from your hard work.
AudioCleaner has made it ridiculously easy to remove echo from audio and video files. Whether you’re fixing a single podcast episode or cleaning up an entire video library, you can achieve professional-sounding results without the professional learning curve. Your audience will hear the difference, even if they don’t consciously realize what changed.
Note: The content on this article is for informational purposes only and does not constitute professional advice. We are not responsible for any actions taken based on the information provided here.